XBMC + XBox + HTPC = XBMCBox – Introduction
INTRODUCTION
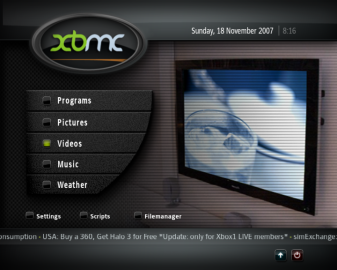
Back in the days when media players such as the WDTV are unheard of, there is a little gem blossoming in the XBox community and if you are lucky enough to own a jailbroken xbox, I am sure you would have heard of the XBMC. It started life as “XBox Media Centre” and certainly lives up to its reputation, so much so that the project evolved over time to become the XBMC media player, the defacto software almost everyone would want to run on their HTPC.
I remember when I had my jailbroken Xbox delivered to me by my younger brother who bought the xbox on my behalf during his visit to Hong Kong at that time, I was thrilled and overjoyed. That was many years ago. And I happened to use the XBox for watching and playing media files a lot more than playing games on it. The XBox has given me the flexibility of watching video files of virtually any format and codecs, when my friends are still busy converting their files into DivX to play on their DVD player. I was really ahead of the game at that time. It was cool.
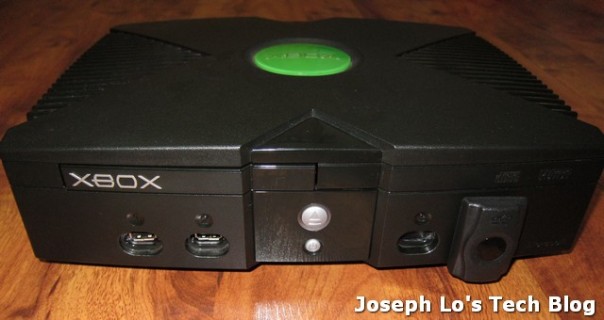
A few years ago my XBox started to become unstable. It would lock up from time to time. I am not sure if it is a hardware issue or software. But I didn’t invest enough time to investigate. I bought a WDTV Mini to replace the XBox and then upgraded to the Asus O!play afterwards. As the XBox has a sentimental value to me, I kept the XBox in the closet, refusing to throw it out all these years. I do not know how I can misplace the original XBox game controller and DVD remote, but the XBox console and the DVD IR receiver remain in one piece. I am glad they are.
While my Asus O!play is 1080P capable and has the ability to play almost any kinds of video files, the GUI is dreadful at best. Navigating across files and directories is awkward and there is no way you can keep track which episodes you have already watched in an anime series for instance. The O!play is functional, but the overall experience pales in comparison with using the XBMC in the past. There are other media players available of course. The Boxee and the AppleTV stand out for me among all the other players. I did not buy the AppleTV2 because it is restricted to only 720P videos. I would like a 1080P device. I did not buy the Boxee as after listening to some end users whine and complain on the forums, my interest on the device dwindles.
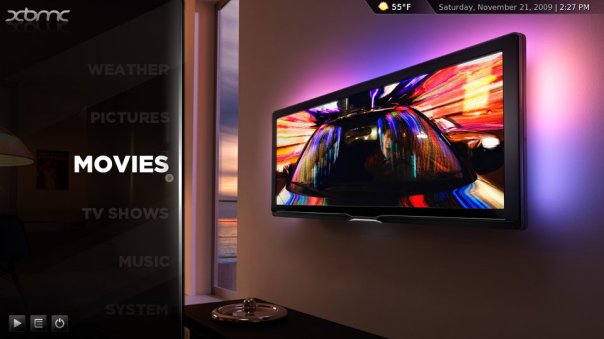
I have been waiting to buy the AppleTV3. The price point is affordable and it would be perfect if it can be jailbroken to run XBMC. As of today, this has not materialize even though there have been talks that a jailbreak port has already been developed and now in beta stage. I have been waiting too long and finally I decided that I should just build my own HTPC. It is time to join the big boys in XBMC forum and AVS forum who run the latest and greatest HTPC with the latest XBMC (which happens to be release 12 to date). The interface has improved leaps and bounds since the early XBMC release.
So I started to gather the information to build the HTPC. One of the first thing is to decide on the HTPC casing after determining the form factor of the motherboard. There are many cool casings around but there is none that brings me back the old memory as an XBMC device. Then I took a hard look at my old XBox in the closet and I made up my mind. I am going to mod a HTPC using the original XBox casing.
A quick google tells me that there are many before me who have also bought into the same idea. This is obviously not a unique idea. I don’t need it to be.
Here are some interesting XBox HTPC mods by others. Google for more examples if you like.
- http://www.youtube.com/watch?v=hxcJOJl61fY
- http://www.zotacusa.com/forum/topic/3769-xbox-htpc-case-build/
While the above are excellent mods, most XBox PC Mod that I have seen involves stuffing a micro-ATX or mini-ITX motherboard into the casing along with a slim ATX power supply, and in the process cutting up the back panel to accommodate the motherboard connector ports. This is essentially turning an XBox into a PC. This is not what I would like to do. I would like an XBox HTPC that does not resemble as a PC. It must look as original as possible. No cutting up panels if possible.
The most elaborated mod I have seen is this video from Will Urbina. See this here – http://willudesign.com/osxboxproTop.html. The first time I watch Will’s video, my jaw bones fall to the ground. I salute Will’s dedication and skill to turn around a great XBox mod and I have to admit that I am no Will Urbina and I just don’t have the kind of tools and skills to execute a job like that. I will be contended with just a simple XBox HTPC mod.
OBJECTIVES
So these are the objectives in my XBox HTPC build:
- It has to be energy efficient. I don’t want a 300w monster chewing up electricity bill as I watch movies. I am exaggerating here.
- It has to be quiet. No big fans swooping air in and gushing air out.
- It has to run cool headed. I have no desire to overclock.
- It has to be cost effective (in other words, cheap and cheerful).
- It has to be powerful and allows me to run any OS that I wanted and if possible, some games. Running at a lower resolution and detail is fine. I am not really a gamer these days.
- It has to have sufficient future proofing build in, just in case I wanted to expand the capability further.
- It has to run XBMC and….
- It has to look like the original XBox and must not give a hint that it is actually a PC in an XBox case.
Seems easy enough I thought…well not really (at least for me with limited modding experience).
FINAL OUTCOME
After about a month of building (most of the time is spent waiting for parts and accessories from eBay), I completed the build. Here are 2 pictures of my new XBox HTPC. Apologies for the poor exposures. I just took a quick snapshot.
The final XBox does not look too shabby I thought. Certainly no match to Will’s ultimate XBox Pro build but I am happy so far.
The front is a stock standard Xbox front panel but I have modded 2 x USB 2.0 outlets to the left of the panel. The Xbox IR receiver is connected to Port 4 and port 3 is an empty port. I have also maintained the LED lights on the front panel with the exception that pressing the big “eject button” start up the machine and pressing the small “power button” actually reboot the thing.

The rear maintains the same fan/ventilation grille design. I did accidentally scratch part of the surface but it is not very obvious unless one looks closer. There is a power port on the left hand side, a HDMI port near the middle, a 3.5mm audio jack is next to it and finally a RJ45 network port to the right.
DETAIL BUILD PROCESS
I will run a series of blog updates to document how I completed the above build. These are the articles that I have planned:
- XBMC + Xbox + HTPC = XBMCBox – Hardware Build
- XBMC + Xbox + HTPC = XBMCBox – Xbox IR Receiver + Harmony 600 Remote
- XBMC + Xbox + HTPC = XBMCBox – Software Configuration
- XBMC + Xbox + HTPC = XBMCBox – XBMC Configuration
That’s all for now. Thanks for dropping by. Watch this space 🙂
Updated 2013.06.09.
The follow up article is now online – XBMC + XBox + HTPC = XBMCBox. Part 1 – Hardware.
Posted on March 4, 2013, in XBMC, XBox and tagged Modding, XBMC, XBox. Bookmark the permalink. Leave a comment.

Leave a comment
Comments 0